gcfuzz is a binary fuzzing tool that uses a technique called "grey-box concolic testing" and improves upon classic coverage-based fuzzing.
It supports Linux ELF binaries and has been tested on both Debian and Ubuntu.
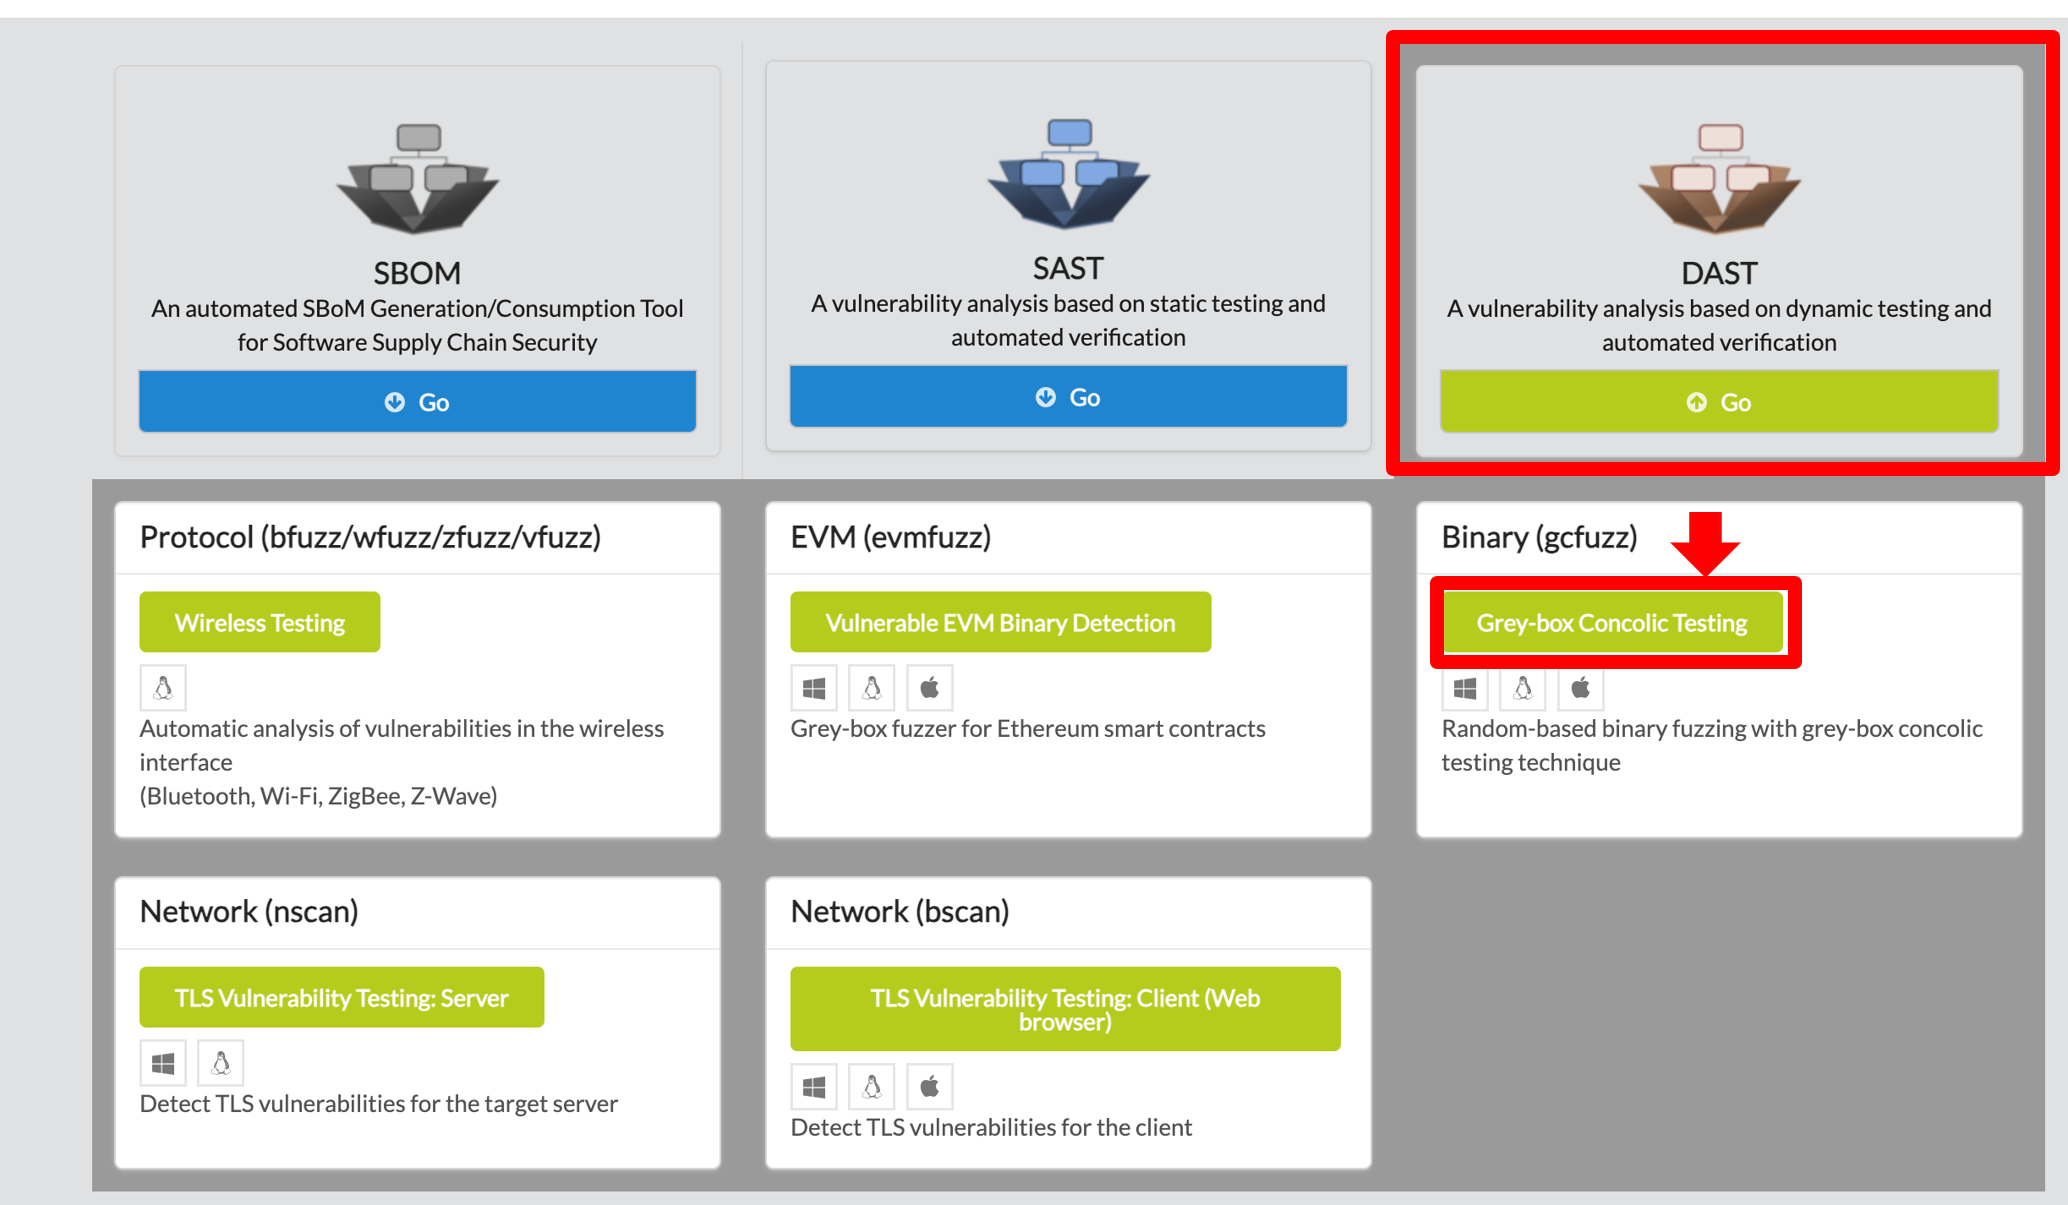
gcfuzz, click on DAST in the main page of IOTCUBE, then proceed by clicking Grey-box Concolic Testing button on Binary(gcfuzz)
In the I/O page, download gcfuzz

If Docker installation has already been completed, please proceed to the next step.
gcfuzz can be used on any operating system that supports docker, python3.
It can be downloaded at https://docs.docker.com/desktop/
If the operating system is ubuntu, you can download it as follows.
$ sudo apt-get install apt-transport-https ca-certificates curl gnupg-agent software-properties-common

$ curl -fsSL https://download.docker.com/linux/ubuntu/gpg | sudo apt-key add -

$ sudo add-apt-repository "deb [arch=amd64] https://download.docker.com/linux/ubuntu $(lsb_release -cs) stable"

$ sudo apt-get update

$ sudo apt-get install docker-ce docker-ce-cli containerd.io
After completing the dotnet execution environment, unzip the downloaded gcfuzz
- Docker image build (This takes a long time.)
- If the shell script is running, Run `build.sh`
$ docker build -t gcfuzz -f docker/Dockerfile. ./docker** If Permission Error, Run `sudo usermod -aG docker $USER` and reconnect.
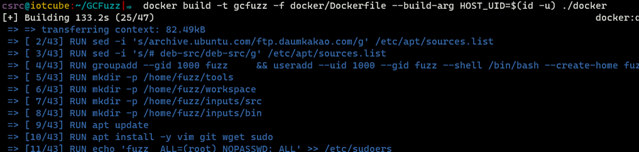
- If gcfuzz is in the image list, the image build was successful!
$ docker image ls

gcfuzz includes a Python script to make using the tool easier.
- Execute run.py including the binary for fuzzing, the source code(not required), and the time (in minutes).
- The source code is not mandatory, but without it, code coverage cannot be determined.
python3 run.py -s input/.c -b input/test.bin -t 30In that command, -s <Source code file> means source code file for fuzzing binray, and -b <binary file> means the binary. And, -t <time limit> means fuzzer execution miniute.
python3 run.py -s examples/abort.c -b examples/abort.bin -t 10
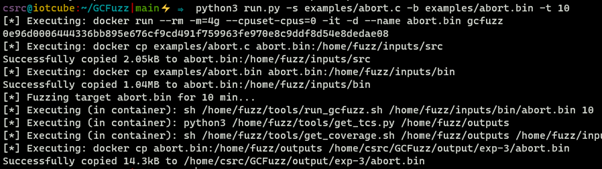
* The 'run.py' script operates as follows: 1. Create a container for testing. 2. Copy the binary and source code to the container. 3. Execute the fuzzing test. 4. (If the source code exists) Get Code coverage. 5. Copy the execution results. 6. Remove the testing container.
* Output File The output file is saved in the output/exp-`N`/testfile/ outputs folder and contains test cases, crash files, and fuzzing results.

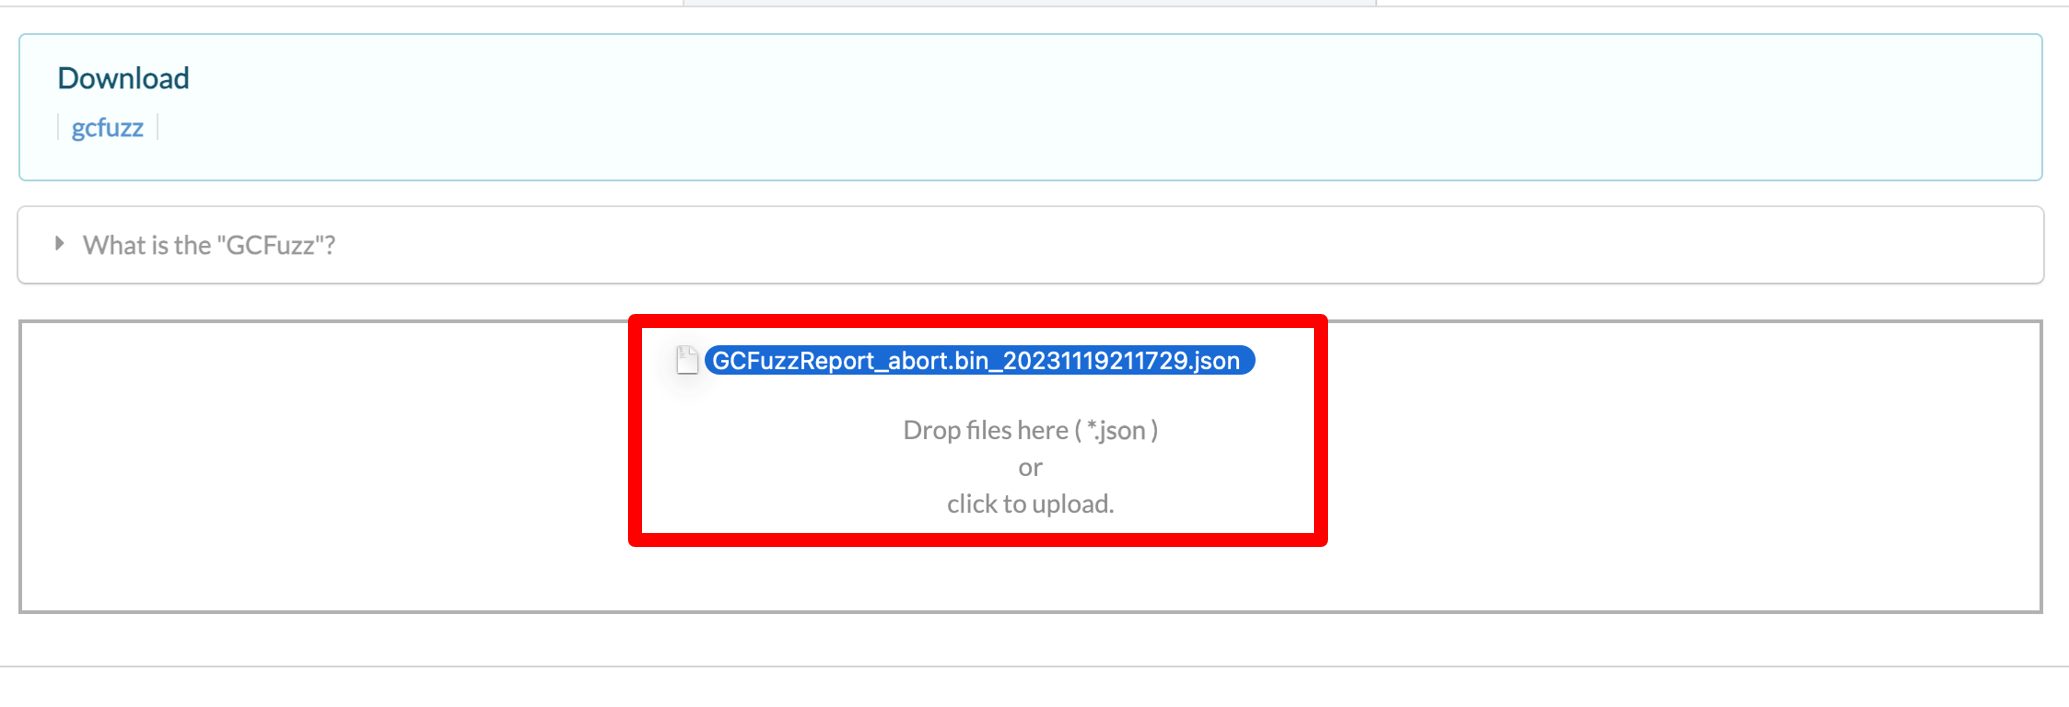
1. After fuzz testing, open the output folder and upload the log file to IOTCUBE for online fuzzing details visualization.
The log file to be uploaded to IOTCUBE was made based on the fuzzing test result, and can be created using a python script.
$ python3 report.py output/exp-1Log file: GCFuzzReport_abort.bin_xxxxx.json
2. IOTCUBE automatically proceeds to the result page when the file (logfile) upload is completed.
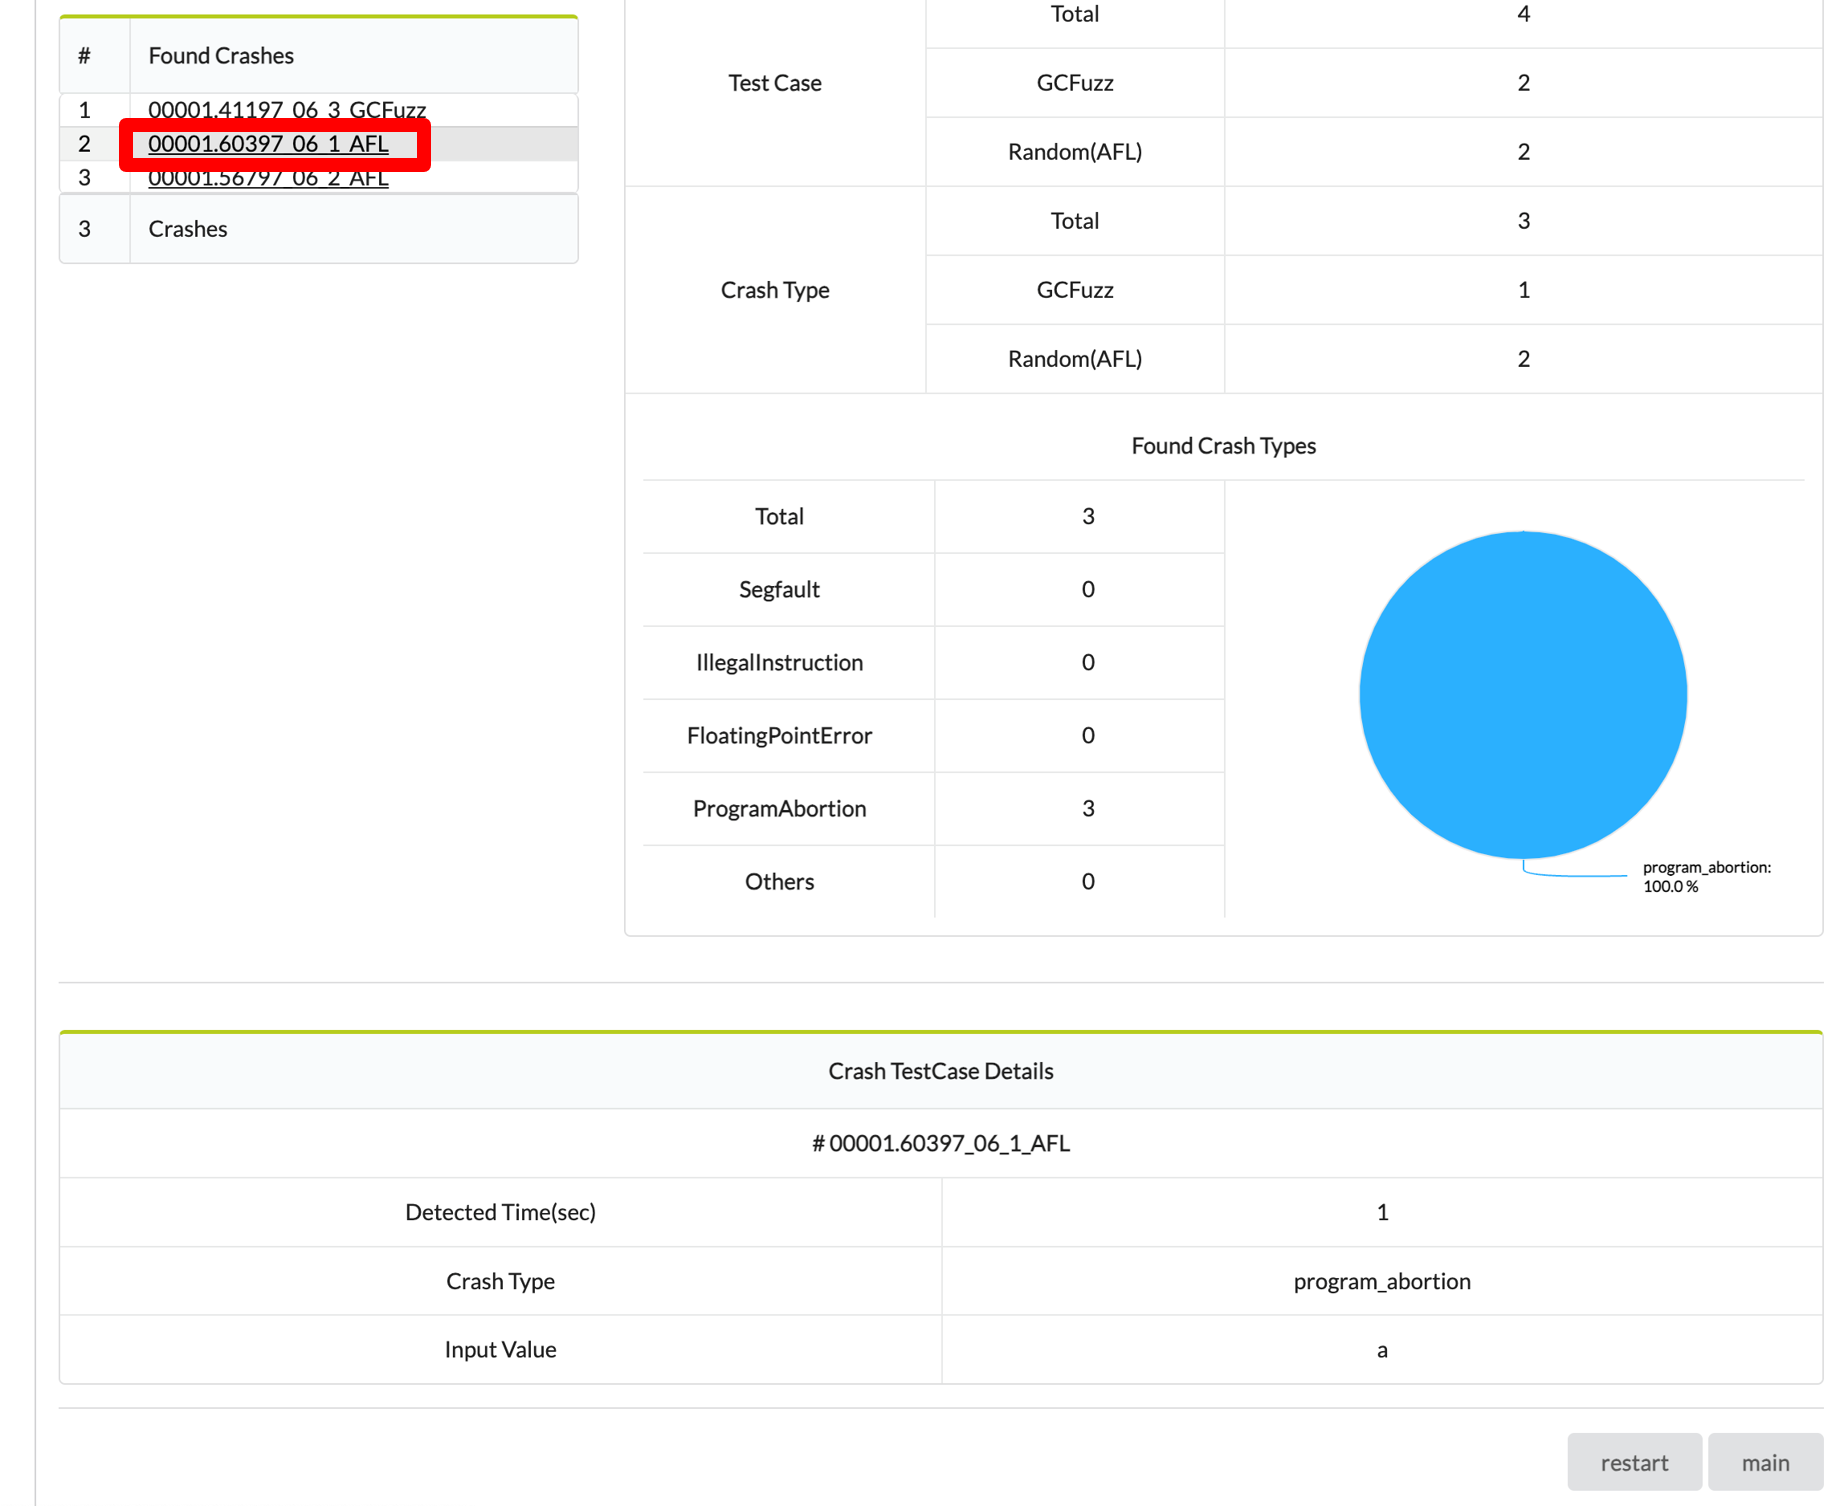
3. Visualization details are available online on IOTCUBE.
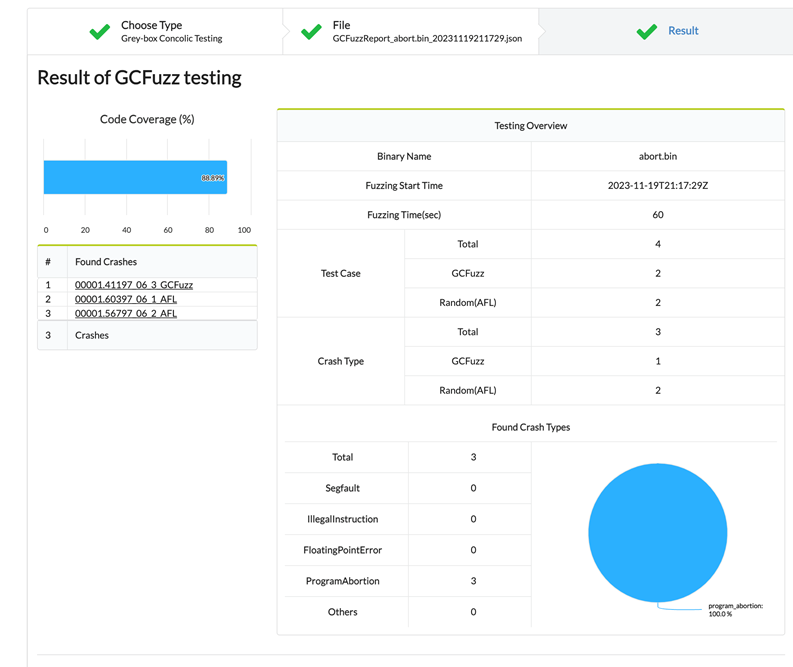
4. Each Crash file details can be viewed by clicking on the Found Crash.