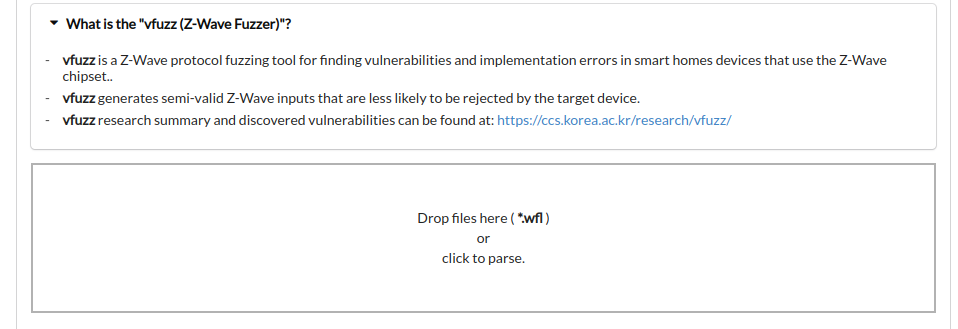
vfuzz is a Z-Wave protocol fuzzing tool for finding vulnerabilities and implementation errors in smart homes devices that use the Z-Wave chipset.
It generates semi-valid Z-Wave inputs that are less likely to be rejected by the target device.
vfuzz research summary and discovered vulnerabilities can be found at : https://ccs.korea.ac.kr/research/vfuzz/
The research paper: "Riding the IoT Wave With vfuzz: Discovering Security Flaws in Smart Homes"
To send and receive Z-Wave packet, vfuzz uses the YardStick One dongle (https://greatscottgadgets.com/yardstickone/)
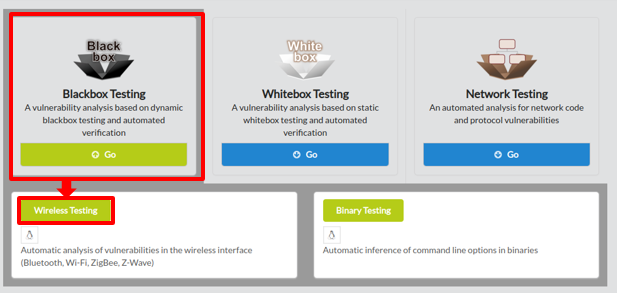
To begin fuzz testing with VFUZZ, click on Blackbox Testing in the main page of IoTcube, then proceed by clicking on Wireless Testing.
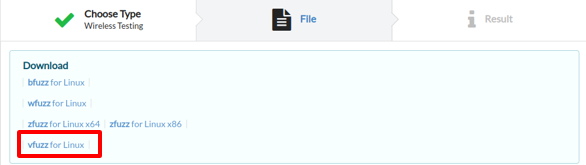
In the I/O page, download vfuzz for linux.
After downloading vfuzz, unzip it.
You can run vfuzz in two modes: Scanning with "-s argument" or Manual modes.

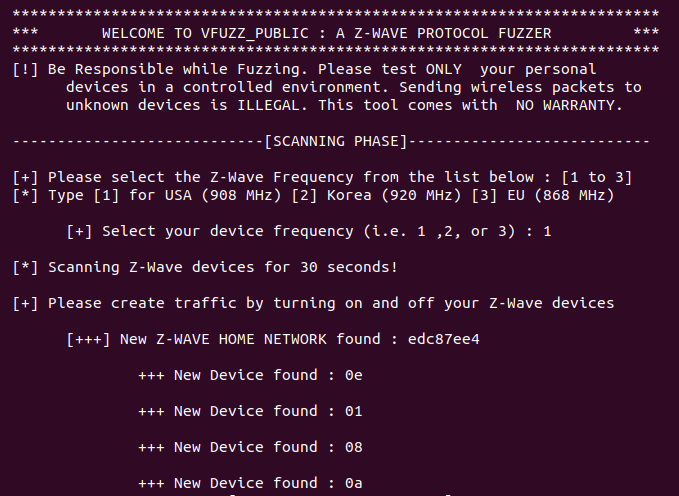
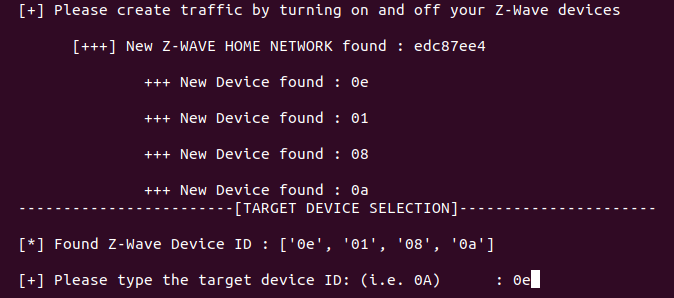
3. In order for vfuzz to scan your devices it requires their network traffic. Therefore, open your mobile phone app (e.g., SmartThings) that manages your Z-Wave devices and start controlling them (turn on/off, lock/unlock, check battery status, etc.). This will generate Z-Wave traffic from devices to controller and vice versa. vfuzz will sniff the devices generated Z-Wave traffic and it will retrieve your smart home network information details such as the main Z-Wave Home ID and current active devices Nodes ID.
4. Select the target device node ID you would like to conduct a fuzz testing. Here we type 0e (without 0x prefix). Note that numbers are converted automatically in hexadecimal (e.g., 0x0e) by vfuzz.
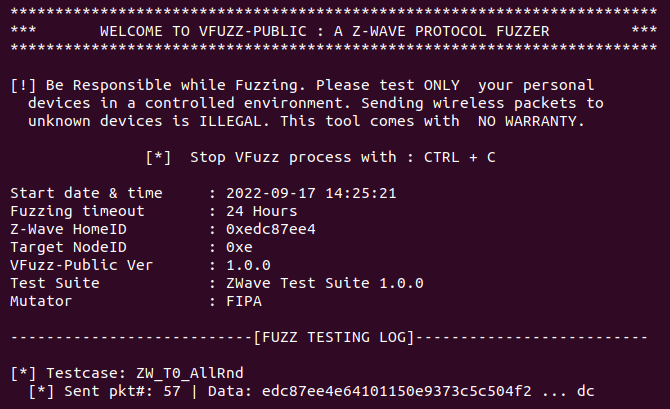
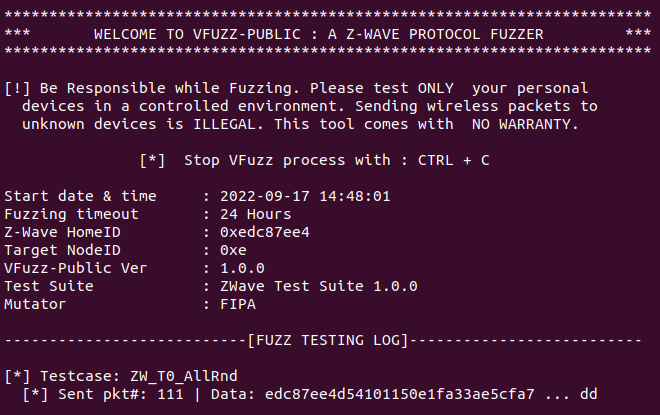
5. Then the fuzz testing on the target device with node ID (e.g.,0x0e) will start
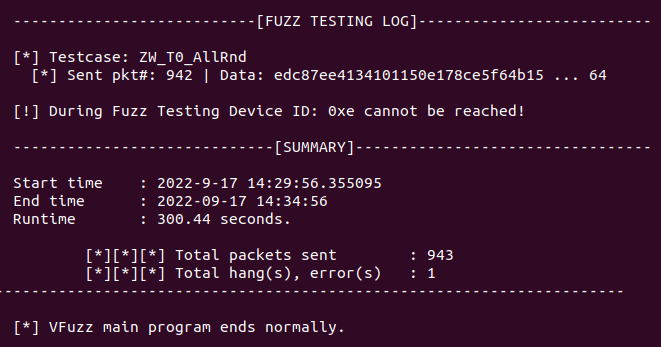
6. During the fuzz testing, if the target device crashes or cannot be reached for a timeout threshold, then a crash input will be added into the log file. If the device cannot be reached, vfuzz will stop running automatically and will provide a brief fuzzing summary (see picture below).
7. After fuzz testing, go to STEP 4 in order to upload the .wfl log file to IOTCUBE for online results visualization.
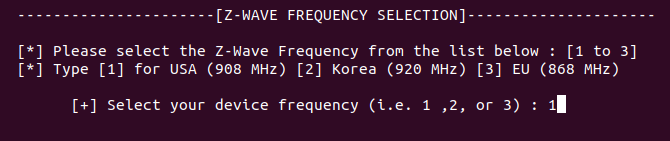
3. Select the supported frequency of the Z-Wave device:
4. Finally, the fuzz testing on the target device will start. Therefore, after fuzz testing upload the .wfl log file to IOTCUBE server for details visualization.
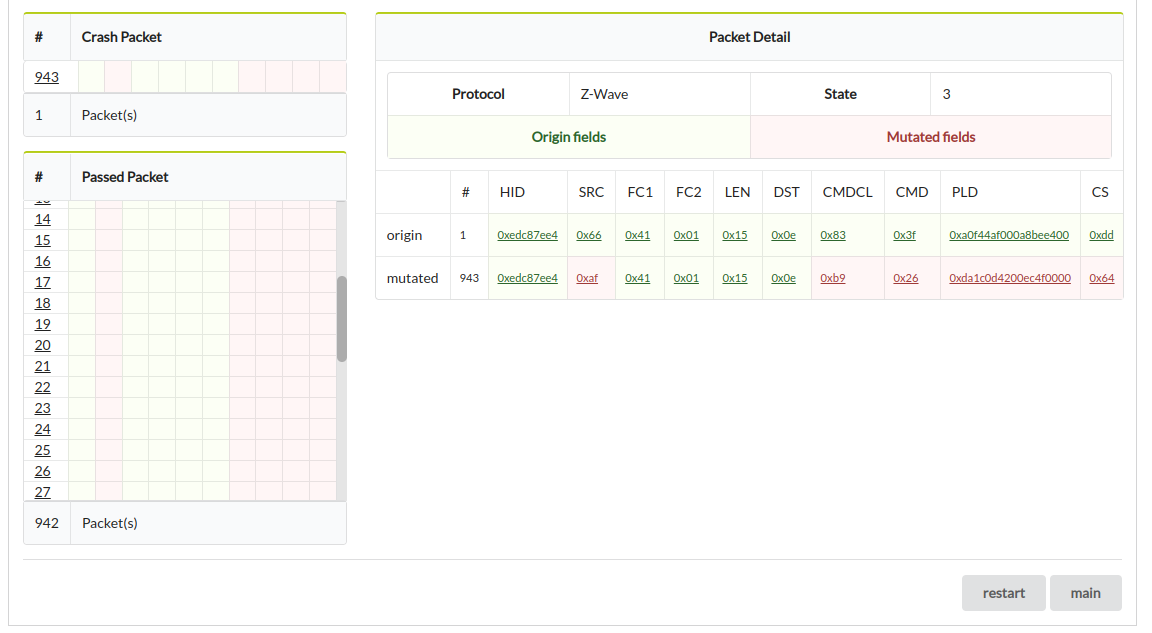
1. After fuzz testing, open the logs folder and upload the .wfl log file to IOTCUBE for online fuzzing details visualization. IOTCUBE automatically proceeds to the result page when the file upload is completed.
2. Visualization details are available online on IOTCUBE.
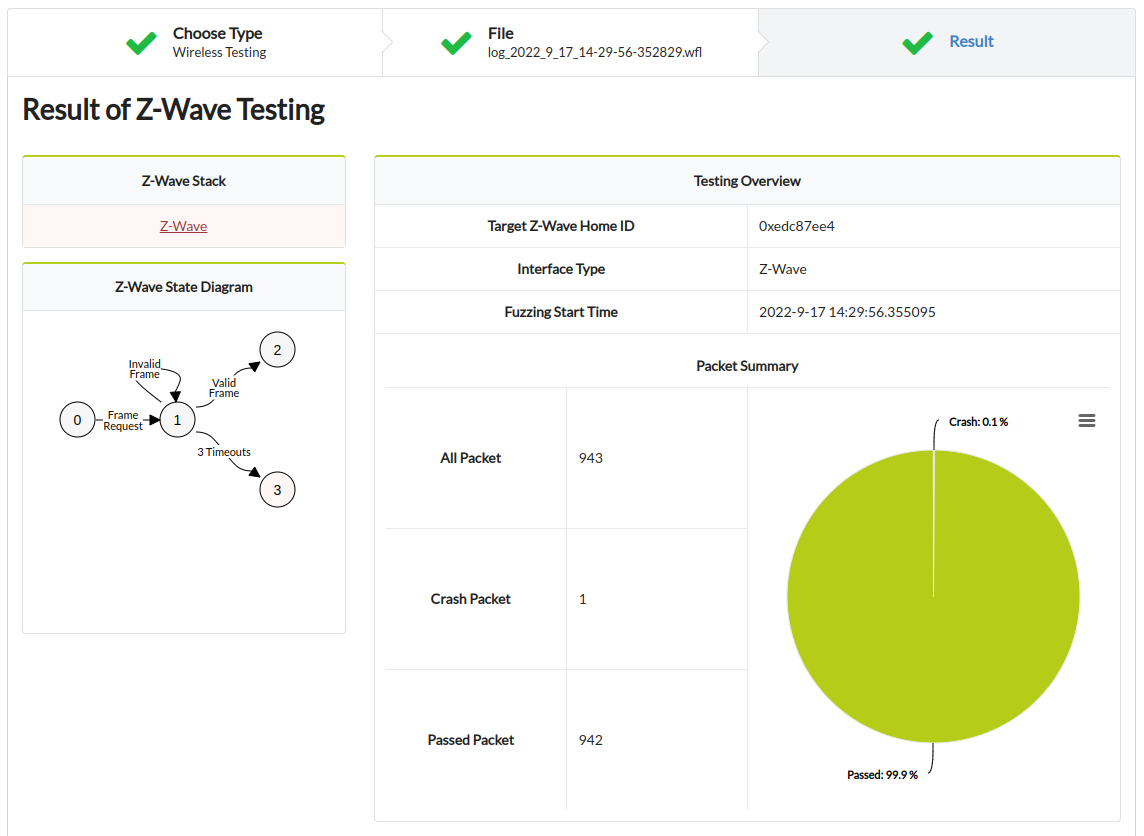
3. More visualization details: